Chart File Manager (Save Chart As)
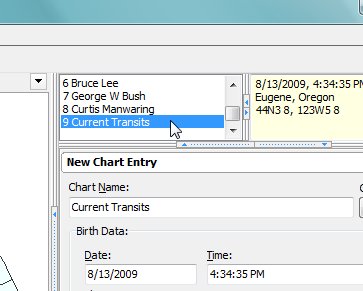
To save a birth chart, you first have to have the charts opened and showing in the Open Charts Listbox as shown below:

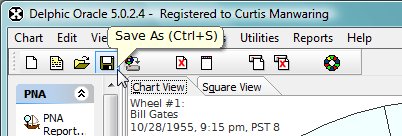
Highlight the charts that you want to save in the list by clicking on them. To select multiple charts, press and hold the Control Key <CTRL>, and click on each chart in the list you want selected. Use the <CTRL> method when you have charts in the list you want to skip. If you want everything in the list Saved to a given chart database then click on the first chart in the list you want to save and then press the Shift Key <SHIFT> and this will highlight every chart in between. Once you have the charts selected, click on the Save button in the toolbar as shown below:

Alternatively you can use the Chart menu and select Save As...
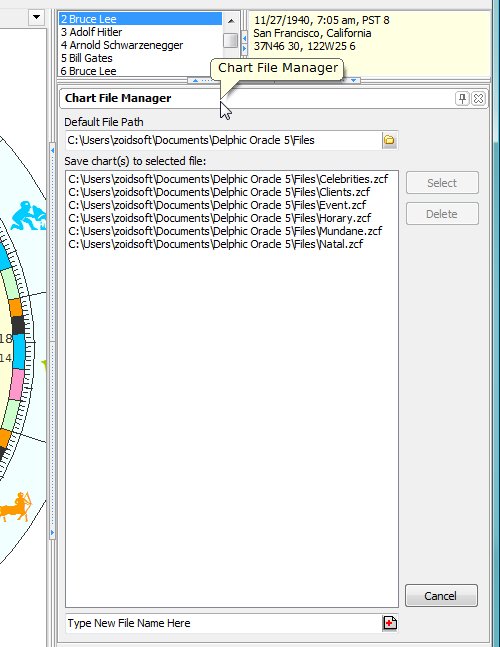
This will bring up the Chart File Manager window:

You should notice that there are several files in the large listbox that I have already defined. Some of these files are empty. You can also create your own chart databases using this window. Until you select one of the files in the main listbox, the Select and Delete buttons are disabled. After selection, these buttons will be enabled and clicking on the Select button will save the charts in the Open Charts Listbox that are selected, to the selected file in the Chart File Manager.
Note: Charts must have a unique name to be saved to a database file. If the chart name matches a name already in the database, then you will be asked to provide a new name for the chart. You could also specify a different database to save duplicate (or alternate) birth charts by a different time.
The following sections will be explained in more detail:
Default file path
Chart file path listing
Adding or deleting databases
Select button and resulting dialog
